Wednesday, 30 March 2011

Rye Dosa (Savory crepe with Rye)


Rye Dosa (Savory crepe with Rye)

Rye is one of those ingredients for which I have not be able to find the Indian equivalent name in any of the languages. Rye is a cereal grain closely related to wheat and barley. It is usually consumed as flour but can also be rolled like oats and eaten or rye berries could be boiled and consumed. Rye is lower in gluten than wheat and for this reason some people who cannot take wheat seem to do well with rye. It also has the benefit of being higher in fibre. There are so many such plus points but there is one minus point that it suffers from. Rye flour when used in rotis or bread tends not to rise. For this reason it is always best to combine it with all purpose flour or wheat flour and also used leavening agents so it rises ok. I did try a rye bread recipe from a website and it came out rock solid, even the birds would not have eaten it. Having got a packet of the flour, I cannot just waste it and somehow I could not accept that I was ineffective in using this flour. Inspired by my ragi dosa recipe, I tried rye dosa and it was very successful. I must say it pretty much tasted like regular dosa, however it was even more hearty and filling. Remember rye flour is whole grain flour afterall so it does come with its own benefits. I always prefer fermented batter for dosa and it suits me well because I try to plan the menu for atleast half the week so over the weekend I have all the preparation done. Here is how I made it and said quantity makes about 12 dosas, depending on the size…

¼ cup urd dal
¼ cup raw rice
½ cup par-boiled rice (idli rice)
¼ cup rye flour
2 tablespoons poha (flattened rice)
1 teaspoon fenugreek seeds (methi)
Salt to taste
Cooking oil/ghee

Soak the urd dal, raw rice, idli rice, poha and fenugreek seeds overnight and grind to fine batter. Add the rye flour and grind further so it combines well and add salt. Batter consistency should be like regular dosa batter.

Allow the batter to ferment for a few hours (it will rise) and pour a ladleful of batter on a hot tava to make yummy dosa. Add little oil or ghee to the circumference of the dosa and once bottom side turns brown and top side is set, flip to cook the other side.

You can stuff with masala of your choice (there will be a few variety of masalas posted soon) and serve with chutney and sambar! Plain dosa with chutney is very good too!


Tuesday, 29 March 2011

Oven Cooked Vegetable Pulav


Oven Cooked Vegetable Pulav


I am still debating whether this is really a pulav or briyani. Reason for that is I have used the help of yogurt mainly for the cooking process than for flavour and as yogurt is typically used in briyani, I am just wondering. We could remain neutral and just call it a delicious rice with a wonderful blend of spices. There are couple of reasons why I wanted to post an oven baked rice recipe (there are few more in the pipeline). Firstly, I know not all readers will have a pressure cooker at home so it may be a bit challenging to cook rice to the right consistency. Secondly, I love to have additional space on my hob especially on Sundays as I tend to fire up all four burners just to speed up my marathon cooking. I can get on with other stuff while the rice is cooking in the oven. I have used store bought pulav masala and it was good. Next time though, I may want to powder it further as I did not like to bite into the big pieces of spices. Alternately you could use whole spices like couple of cardamom pods, a cinnamon stick a bay leaf, couple of cloves and a star anise. Another option is to use garam masala powder. It is important to fry the spices in oil else the raw smell from them does not go away in the cooking process. Here is the recipe...

1 cup rice, uncooked
1-2 cups mixed vegetable
1 red onion, sliced
1 teaspoon ginger garlic paste (optional)
2 tablespoons yogurt/curd
1 teaspoon pulav masala or whole spices as suggested earlier
Cooking oil or butter or ghee
2-3 green chillies, slit
Salt to taste
Turmeric powder
Coriander leaves, chopped


Rinse and soak the rice for 15-30 minutesin an oven proof dish. I used about 1.5 cups water for 1 cup rice, you may need more or less depending on the quality of rice. Soaking process helps in keeping the cooked grains separate.

In a skillet, heat some oil/butter/ghee and fry the onions along with some turmeric powder, ginger garlic paste and green chilly and add the vegetables once onion turns soft. If using frozen, cook until it thaws fully and loses some water becoming tender. If using fresh, cook until they just become tender.

Heat little oil in the skillet and add the masala and fry until aromatic

Add this to the soaking rice along with the onion vegetable mixture and add required salt and yogurt


Mix well and cook covered in a preheated ven at 180deg C for 40-50 minutes and stir about twice in between.

Garnish with coriander and serve!

Saturday, 26 March 2011

Butterless Ragi Peanut Cookies


Butterless Ragi Peanut Cookies


This is the 175th recipe on my blog and to me it is a nice milestone. My baking skills were not very great not that long ago and I was not quite experimenting typically baked items. However I am now proud to have come out of that shell to a stage where I have made abiscuit without any butter. The main ingredient in this recipe is peanut butter. Some may wonder that peanut butter is still fat in another form so there is no merit. I got some nutritional information from here so it becomes easy to understand relative merits of peanut butter over dairy butter. A cup of peanut butter is said to have total fat of 130g of which 27g is saturated fat and zero cholesterol. It also contains about 65g protein and 15g dietary fibre in addition to plenty of calcium and iron. On the other hand a cup of butter contains 184g fat of which 117g is saturated fat. It also contains 488mg of cholesterol, no dietary fibre and 2g of protein. It contains some calcium and Vitamin A. I am not an anti-butter person, infact I love it but I think the fat is worrying and where possible I would avoid it. I have added little milk in this recipe but am guessing it will be ok to add water instead. First time I made this, I used very little baking powder (about 3 pinches) and texture came out like store bought biscuits, very crisp. The second time I made it I added ¼ teaspoon baking powder and it came like cookie with a crisp outer and ever so slightly soft centre. Depending on your preference, you could vary baking powder quantity. I used crunchy peanut butter and I loved to bite into the nut. You can choose smooth version if you prefer. Either case the quantity of milk is only indicative as it depends how much moisture is there in the peanut butter. With all that build-up, here is the recipe...

¼ cup ragi, finger millet flour (replace with wheat or all purpose flour if not available)
¼ cup whole wheat flour
¼ cup all purpose flour
4-5 heaped tablespoons of peanut butter
¼ cup sugar
3 pinches or ¼ teaspoon baking powder depending on preferred texture
Few tablespoons of milk

Mix the flours, sugar and baking powder and add the peanut butter and mix well until well combined. You could use an electric mixer or your hand for the whole process

Add about four tablespoons milk and keep mixing so you make a soft dough. You may need more milk but add only one spoon at a time to avoid a runny dough. It should hold ots shape when you make a ball.


Roll the dough into a disc about 4-5 mm thick and cut to desired shape using cookie cutter. You may have to divide the dough into portions depending on how big your work surface is. Alternately, you can take small balls of dough and press between your palms to get a disc shaped cookie.

Place them in a baking tray lined with baking paper and bake in preheated oven at 150degC for 12 minutes or until edges brown.

(the hand shaped biscuits did not become round, this is another batch I made yesterday just shaping by hand)

Cool and serve!

I noticed that the version with just pinches of baking powder remained crisp for longer than one with more baking powder.

Friday, 25 March 2011

Ginger Chutney (Andhra Style)


Ginger Chutney (Andhra Style)


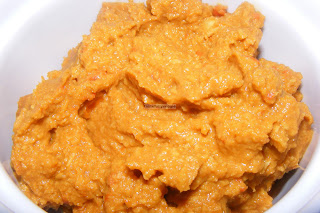
When you have some great chutneys, it is hard to determine whether idli or dosa is the nain dish or the chutney. Well, usually we need chutneys for idli or dosa and usually upma and pongal as well. I like variety in chutneys and not just the usual coconut chutney. I saw a ginger chutney recipe on a television program and adapted it to our taste. One of the ingredients I forgot to add was dry red chillies but the chutney still came out great. Am sure the chillies will make it even better. I have almost stopped buying coconut and grating it freshly even for chutneys. I could not break and grate them myself so often they were just rotting in the shelf. I stopped buying them and now I use dessicated coconut for all coconut based dishes and I must say I do not really miss fresh grated one. I may not do the same for few dishes like kozhukattai etc. as the fresh juices from the coconut adds a special flavour. Anyway here is my chutney recipe...

3 tablespoons grated or dessicated coconut
1 tomato, chopped
½ - 1 teaspoon tamarind paste
2-3 tablespoons ginger,chopped
2-3 dry red chillies
Salt to taste
Asafoetida
Cooking oil

Heat a kadai and little oil and fry the dry red chillies, coconut, tomato and asafoetida and cook until the tomato wilts and add ginger and tamarind paste at this stage

Cool and grind with required salt and serve

You could use some mustard seeds for tempering

Wednesday, 23 March 2011

Kathrikai Kara Kozhambu (Eggplant in Tangy Spicy Sauce)


Kathrikai Kara Kozhambu (Eggplant in Tangy Spicy Sauce)


Whenever mom could not cook at home (not very often as she made every effort to make us good food), we would order meal from Saravana Bhavan. One of the items I used to love from them was kara kozhambu. I remember my mom making it for me just like how they made it. It has been many years since I last had it and recently my sister-in-law reminded me of the dish. I realised I still had loads of the Indian eggplants to finish off so I just took the opportunity. It is a very quick recipe and can be whipped in very little time. As I loaded it with eggplant, which is one of the five a day vegetables, it just means you get a healthy and wonderful comfort food. Well, kara kozhambu to me is a comfort food. ‘Kara’ means hot and ‘kozhambu’ refers to sauce but you can make it as hot or as mild as you like. Serve it with plain rice, chapattis or curd rice. Yum yum!

1 onion, coarsely chopped
1 tomato, roughly chopped
2 tablespoon grated coconut or dessicated coconut
1 cup of chopped eggplant
1 teaspoon tamarind paste
1 teaspoon mustard seeds
Asafoetida
½ teaspoon sambar powder (optional)
½ teaspoon chilly powder
Turmeric powder
Salt to taste
Cooking oil

Grind the coconut, tomato and onion to a fine paste. You could add some garlic pods to this if you like. (forgot to click, sorry!)

Heat some oil and add mustard seeds. Once it crackles add asafoetida, turmeric powder and the cut eggplants and sauté for couple of minutes

Add tamarind paste and enough water to cover the eggplants and cook covered.

Once the eggplants are cooked add the ground paste, chilly powder and/or sambar powder, salt and cook till raw smell goes. Add water if needed and cook until desired consistency

Serve with rice or rotis!

Monday, 21 March 2011

Ragi Shortbread (Finger Millet Shortbread)


Ragi Shortbread (Finger Millet Shortbread)


Scotland is very popular for shortbread and it is considered a great dessert. Shortbreads are unleavened biscuits that have a crumbly texture primarily because of the high fat content. It is usually made with plain flour, sugar and loads of butter. Well all three do not sound healthy to me but I do think they are good indulgence once in a while. As far as possible I make healthy version of classic dishes and this was no exception. I made shortbreads for the first time when I was packing to go home last year. I had lots of butter and flour and no baking powder, so there you go, yummy shortbreads made! This time I was not going to make it that way as my wee one is old enough to have biscuits and I would rather feed him a healthy one. I had some ragi (finger millet flour) flour I bought from India last year. We took pain to sprout the ragi, dry it, roast and grind it. I had to whip this up really quick as my wee one was a bit restless and finds biscuit making quite exciting. The pictures may show that I did not do a perfect job of packing it, but am sure you will understand what I mean. Here is how I made it…

2/3 cup ragi flour
1/3 cup maida (all purpose flour)
1/3 cup sugar (more if you have a sweet tooth)
60g butter
Pinch of salt
Ground spice like cardamom powder, cinnamon or nutmeg powder is optional

Combine all dry ingredients together and mix well

Melt the butter and add to the dry ingredients and combine using your hands. The amount ofbutter should be just enough to make the flour stay together when compressed in the hand

Put this mixture in an oven proof dish, preferably lined with baking paper and pack in such a way that it forms a uniform shape and about 1cm or so thick

Bake in a preheated oven at 180degC for 20 minutes. Cool for about 5 minutes and cut into desired shape


I have written more about the benefits of ragi here. This recipe uses far less sugar and fat than traditional recipe and helps appreciate the earthy flavour of ragi. My family liked it, hope you like it too.

Saturday, 19 March 2011

Karela Curry


Karela Curry


I have always loved challenges and kind of get bored if I do not have one for a while. That is one of the reasons why I seldom cook the same dishes over and over although sometimes I do depending on availability of time. I love to experiment and to me karela, bittergourd is presents a great opportunity to experiment simply because if it is not cooked well it may go straight into the bin. I decided to take a punt this time with karela and did not want to get into my comfort zone and make stuffed karela, which by the way are awesome. For a change I wanted to try a gravy, more like a side dish for rotis/chapattis. I looked up few recipes and one gave me an idea that I could add crispy karela to the curry and what better way than to bake it and make it low fat! The results were so good that one of our guest was talking about it even few days after he came for a meal to our place. I quite liked them as well. I do think they may taste great with maida roti as the delicate taste of the roti will complement the mixed flavours in the curry. We had it with wholewheat rotis and we did enjoy it. Here is how to make it…

1 teaspoon mustard seeds
1 onion, finely chopped
2 tomatoes, finely chopped
2 tablespoon tomato puree
Turmeric powder
1 teaspoon coriander powder
1 teaspoon cumin powder
1 teaspoon chilly powder
1 teaspoon kasoori methi (dried fenugreek leaves)
2 tablespoon coconut cream or coconut paste
2 karelas, deseeded and chopped
Salt to taste
Cooking oil

Add some salt to the chopped karelas and leave for 15-30 minutes so it gives away its juices and bitterness. I usually skip this step coz I do not mind the bitterness but you may want to do so.

Rinse and drain them and add a teaspoon oil and mix and place in a oven proof dish and bake at 180degC for 30 minutes and keep mixing it once or twice in between

Heat some oil in a skillet and add mustard seeds. Once it crackles, add onions and fry until soft

Add the tomatoes and cook covered until tomatoes become mushy

Add the tomato puree, turmeric powder, coriander powder, cumin powder, chilly powder and requied salt. Add a wee bit of water as well and allow the mix to boil.

Add the kasoori methi and coconut cream, mix and simmer for about 3-5 minutes

Add the baked crispy karela and serve hot!

It goes well with rotis/chappatis and also variety rice like ghee rice, onion garlic rice.

Some may wonder why I used tomatoes and tomato puree. As we are dealing with a bitter veggie, the tanginess of the tomato will help deal with it better. I used preservative free double concentrated puree and results were great.

Friday, 18 March 2011

Baghara Baingan


Baghara Baingan
I saw a program on the tele in which they made Hydrabadi baghara baingan. At that time I was did not think I will have access to any brinjal other than the Spanish one and did not quite bother to note the recipe. However I did get a chance to buy the long and sort of thin brinjals and first thing I wanted to try was this dish. I looked for a few recipes hoping it will ring a bell as to how the lady on the television program did it but not quite lucky. I then saw Tarla Dalal’s recipe and tried it. The outcome was very nice. I must say that the appearance of the dish is probably not universally appealing and even my husband kept asking me if it was fish. It was hard to get a good picture with the eggplant clearly visible in the finished dish so I took the shots when I ate them with dosa. They were great with dosa, chapattis and curd rice. Here is the recipe...

4-5 eggplants, slit length wise but still held together by the sepal part of the veggie
1 teaspoon mustard seeds
¼ teaspoon fenugreek seeds
2 green chillies slit
Curry leaves, 1 sprig
For spice paste:
2 tbsp sesame seeds
2 tbsp grated coconut or dessicated coconut
2 tbsp raw peanuts
1 tsp chopped ginger
1 tsp garlic, chopped
1/4 cup chopped onions
1/4 tsp turmeric powder
1 tsp coriander (dhania) powder
1 tsp cumin seeds (jeera) powder
1 tsp chilli powder
1 tsp tamarind pulp

Roast all ingredients except the coriander powder, cumin powder, turmeric powder and tamarind pulp mentioned for spice paste, cool and grind to paste adding the remaining ingredients for the paste

Heat a couple of teaspoons oil and add the mustard seeds and fenugreek seeds. Once mustard crackles, add the brinjals and sauté for a couple of minutes, by this time it will begin to change colour, keep aside

In the same pan add the ground paste and little oil and cook until mixture leaves sides of the pan

Add the brinjals, required salt, little water and curry leaves and cook covered until it is done

Garnish with coriander leaves if you like and serve!

Saturday, 12 March 2011

Masoor Palak


Masoor Palak


As my pantry was already full with stuff that I am really trying to finish off I bought a lot of fresh vegetables when I went to the Indian grocery shop in a neighbouring city. Although I was very enthusiastic about them when I bought it became a bit over whelming as I had to use them as quickly as possible. One of those was palak and I was quite surprised by how many times I thought I could do this or that with palak and when it was right there I could not easily figure out what to do. Part of the reason probably is that I have pretty much been replacing palak with the spinach we get at supermarkets and have been quite happy with those. I was flipping some cook books for ideas as my brain had just paused and noticed Tarla Dalal’s masoor palak recipe. I decided that would be a great option because my husband always prefers dals with rotis and any means to make them even more nutritious would be great. The original recipe did not call for any masala powder butI thought it is way to simple and plain to have nothing and decided to jazz up the innocent lentil palak combo with some dhansak masala (I had bought this during my Indian grocery shopping as well!). I used MDH brand and it was quite good. You could use garam masala instead if you do not have dhansak masala. Here is how I made the dish...

½ cup red lentil, pressure cooked
1 bunch palak leaves, chopped
2 tomatoes, chopped
1 onion finely chopped
1 teaspoon dhansak masala or garam masala
3 green chillies, slit
4 cloves garlic chopped finely
Turmeric powder
1 teaspoon cumin seeds
1 teaspoon coriander powder
Salt to taste
Cooking oil

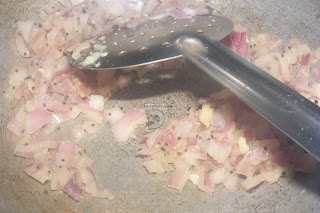
Heat a little oil and add the cumin seeds and once it browns, add the garlic, chillies and onion

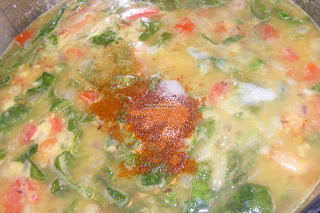
Once onion softens, add the cooked dal/lentil, palak and tomatoes and cook until palak and tomatoes are done. Add water if needed.

Add the dhansak masala, turmeric powder, coriander powder and salt and simmer a few minutes. Add water if needed

Serve!