Friday 30 April 2010

Low Fat Vegetable Balls


Vegetable Balls
It is quite natural to fancy cutlet sort of snack on a nice autumn day. But little over four months post childbirth the sight of my tummy just did not let me indulge. I had gone far enough to get the vegetables boiled and had to get on with the rest of the preparation. How do I enjoy a recipe with crispy outside and soft inside spiced up with great flavours without the guilt? As always, mom’s idea came in handy. It was good in more than one way because it not just met my requirement of using very little oil but also put to use a cooking utensil that was otherwise seldom used. The magic mantra was the kuzhi paniyara koodu (the dish in which kuzhi paniyaram is made). I love the paniyarams and was sure I wanted this dish in my kitchen. My husband was concerned I would clutter the house and hence I had to be cheeky to get this. I went shopping in East Ham with my brother. I was about 4 months pregnant and remember not just enjoying the masala dosai and pongal in Vasantha Bhavan but also my victorious shopping. For those of you who have not seen kuzhi paniyara koodu before, here is a picture of mine...

Now for my recipe...
1 cup cubed boiled potatoes
½ cup green peas boiled
½ cup carrot diced and boiled
2 green chillies
1 tablespoon finely chopped coriander leaves
Chilly powder (optional)
1 teaspoon coriander seed powder (dhania powder)
1 teaspoon cumin seed powder (jeera powder)
Turmeric powder
Salt as required
Breadcrumbs
Cooking oil
In a pan, add about 1 teaspoon oil and put all the powders except chilly powder and green chillies and fry forcouple of minutes on a low flame. Combine all the boiled/steamed vegetables with the powders and mash them. Add chilly powder if desired, salt as required and add the coriander leaves. It is important that you make the balls when the vegetables are still hot else they will not retain shape. To help withstand the heat keep wetting your hands in cold water. Make balls to the size that will go in your kuzhi paniyara koodu. Once you roll to form the ball, roll it in breadcrumbs so each ball is uniformly coated. In the mean time keep the ‘koodu’ on the stove and heat on high flame. Add less than a teaspoon of oil in each ‘kuzhi’ and reduce flame to medium. Once the oil is hot, start putting the balls in carefully. Carefully keep turning the balls so they are uniformly cooked. When you put the top side bottom, put less than a teaspoon oil so that this side can also get cooked well. Serve hot with ketchup !
You could use other vegetables of your choice. Be careful not to add too much carrot or peas as they can make the dish a bit sweet. You may want to add some grated ginger. Enjoy, guilt free!!

Microwave Semiya Payasam/Microwave Vermicelli Payasam


This awesome dish is one of the few sweet dishes I liked as I usually prefer savory food. I was however clueless about how things will change during my pregnancy. I started loving sweet dishes and was craving for semiya payasam. As I had a tough time during my pregnancy, I had to wait until my 7th month or so for my mom to come and make me her yummy semiya payasam. Her payasam will be so creamy and ice cream like. I remember that my brother used to insist on the payasam served chilled for him while I like it warm. Invariably I will not have a chance to have it when I would come home from work as I prefer it being fresh. Mom had and has a habit of making some sweet dish every Friday as ‘neivedhyam’ and semiya paysam was often on the menu.
After our India trip this year, I am trying to pick up some good habits my mom practises so my son grows up seeing our practise, belief and faith. Considering Friday auspicious and giving importance to offer food to God is part of it. May just be a coincidence but for the last few Fridays I have been using the microwave to make the sweet dish. The ingredients and steps are similar for both microwave and stovetop cooked payasam so you could do either. Here is how I did it...
1/3 cup semiya (I crushed it by hand to make strings small)
3 teaspoons ghee (clarified butter)
Pinch of saffron
2 cups milk
1/3 cup sugar
1 tablespoon raisins/sultanas or more
1 tablespoon cashew nuts or more
3 pods Cardomom (Elaichi) if desired – only seeds required
Microwave safe dish
Take a teaspoon of ghee and just melt it in the microwave (takes about 15 seconds). Add the raisins and heat for 15 seconds until it puffs up. Keep the puffed raisins aside and add cashew nuts, heat for a minute stirring in between and keep aside once they turn golden brown. Put the semiya in the left over ghee and stir well so the strings get coated, add more ghee if needed. Heat for about 30 seconds, stir and heat further for 50 seconds. The idea is to roast the semiya golden brown. Keep aside the roasted semiya. Take about 5 measures of milk (5 times the semiya) and heat for 2 minutes. Stir and continue heating for 3 minutes again stirring in between. This helps the milk reduce and provide nice taste and consistency to the payasam. Add the roasted semiya to the milk and cook for about 3 minutes stirring atleast once every minute. If you do not stir often, you will run the risk of getting clumps of semiya rather than separate strings of it. Check if semiya is cooked. Add one measure of sugar i.e. same measure as semiya, cardamom seeds and heat for a minute. Add more milk if required and also the saffron and heat for 2 minutes. Finally add the raisins and cashews. Semiya payasam is ready!!
Semiya is also called Vermicelli and is made of durum semolina, just like pasta. So, if you are allergic to wheat, I am afraid this is not for you.
Cooking time varies depending on microwave and also the quantity you are making. The quantity I used serves 2.

Tuesday 27 April 2010

Radish Raita/Radish Pachadi


Radish Raita/Radish Pachadi
Radish was always far down in my list of vegetables I like. Mom use to make radish sambar but I would so dislike the smell of radish and never bothered to give it a try. It was after wedding that I gave it a shot in my mother-in-law’s place. She had made a salad which my husband usually enjoys. I then revisited my list and moved radish up. My mom used to get a bunch of fresh white radish just uprooted from the ground from a field adjacent to the place where she would go for morning walks. Just the sight of those fresh radish would be tempting enough but there is another great reason why love for radish is well worth it. And that is because it is called free food...hold on, you got to pay to buy it but it is free to eat i.e. it is almost empty on calories with just about 16 calories per 100g. Isn’t that great? The Tesco here stocks Mooli, the white radish but they are not as good as the ones I used to enjoy in India so I buy the British radish. These are small turnip shaped red-pink coloured radishes. Despite their size they are so rich in nutrition including vitamin C, folates and minerals like iron, magnesium, copper and calcium. If all this goodness is not enough, this dish does not need any cooking and is quick to make.
1 packet of radish (about 10-15 radishes)
¼ teaspoon cumin powder (jeera powder)
¼ teaspoon coriander powder (dhania powder)
Salt as required
1 cup yogurt/curd
Wash the radish in cold running water. Cut the root end and holding each of them by the side where the leaves would have been, grate the radish. There is no need to peel the skin. Once salted the radish give up water and could make the raita watery so do the rest of the preparation just before serving. Add curd and salt (if required) and the cumin and coriander powder. Raita is ready for you to enjoy.
I love this raita and can finish a bowl of it all by myself. It goes very well with a variety of rice and breads especially if you have spicy side dishes. Hope you enjoy it.

Mixed Vegetable Poriyal(karamudhu)


Mixed vegetable Poriyal (karamudhu)
As with most typical south Indian menus, vegetables are a must have along with the main dish like rice and sambar/rasam/aviyal etc. In the place where we live we do not get a whole lot of vegetables that we were used to in India. Now we do have an option of shopping online and fresh vegetables land at my doorstep the next day but at a price. These constraints have always pushed me towards finding ways to cook available vegetables to suit the South Indian style. While this dish does not exactly comprise of vegetables that is not available in India, but it is just a matter of putting a few veggies together so it is enticing. I also like making mixed vegetables as it keeps the job of cutting easier. The key benefit of this dish is that it is colourful and that means it has a variety of nutrients. Peas are suppose to be the richest in vitamin B1 which is essential for energy production, nerve function and carbohydrate metabolism. Carrots are rich in vitamin A and also help prevent several cancers. Potato is a starchy vegetable that forms a part of a balanced diet. Potatoes supposedly contain fibres half soluble and half insoluble making the digestion slower and keeping you full for longer. Here is how to make this mixed veggie for two persons
1/3 cup peas (fresh or frozen)
2 medium sized carrots finely chopped
2 medium sized potatoes finely chopped
1 sprig curry leaves
2 dry red chillies broken
½ teaspoon cumin seeds (jeera)
½ teaspoon mustard seeds
¼ teaspoon turmeric powder
½ teaspoon chilly powder or sambar powder
Asafoetida
Cooking oil
Salt as required
In a kadai/pan put about 1 tablespoon cooking oil and add the mustard seeds and cumin. Once the mustard seeds splutter and cumin seeds turn dark brown, add turmeric powder and asafoetida. Add the curry leaves and dry red chillies and in about a minute on low flame add the vegetables. Allow the vegetables to cook and stir occasionally. Do not add salt until the vegetables are cooked as it will make them turn mushy. To check if vegetables are done, take a ladle and press on a big piece and if it cuts through readily, it is done. Add salt and chilly powder/sambar powder. If you are not a fan of hot food, then you may skip the powder and just rely on the dry red chillies added. Enjoy with sambar or rasam or even curd rice. Must be good with chappathis if you are not a gravy person.
The potatoes will tempt kids to have it and that makes it easier to give them peas and carrot.

Friday 23 April 2010

Mint Rice/Pudhina Pulav


Mint rice/Pudhina Rice
Mint is suppose to have got its name from nymph Menthe, who was turned into a plant by goddess Perserpina, when she got to know that Pluto was in love with her. Interestingly the goddess seemed to have preserved the beauty of the nymph in the plant form too. I love the refreshing smell of mint and feel my kitchen gets freshened by its presence. I was not a big fan of mint until I tasted mint rice brought by one of my schoolmates. My mom then made it at home for me and until date I have not been able to reproduce that taste, shame. However, I did come up with my own recipe which I quite like and more importantly my husband likes as well. I usually post recipes after he says they are good. Here is what you need and how you make this aromatic rice...
1 big onion finely sliced or chopped
Vegetables of your choice and mine was 1 green and 1 red pepper
1 bay leaf
1 piece cinnamon stick
2-3 cloves
Salt to taste
1 cup cooked rice (preferably grains separated and not mushy)
Cooking oil
To make the sauce:
1 big red onion or 2 small red onions chopped
2-3 green chillies
1 cup mint (I used 2 packets 30g each)
2-3 cloves garlic (optional)
1 inch long ginger piece (optional)
½ teaspoon Turmeric powder
To make sauce - In a wok or saucepan, add about a tablespoon of cooking oil and once heated add turmeric powder and fry onions, garlic, chillies and ginger. Once well cooked add washed mint leaves and allow them to wilt. Allow time to cool and grind to paste adding limited water.
To finish the rice – In the wok or saucepan add 1 tablespoon cooking oil add the whole spices and fry the onions. Add vegetables of your choice and once done add cooked rice and the ground paste. Add salt as required. If desired you may add the juice of a lime once taken off the stove. Mint rice is ready for you to enjoy.
Mint was historically used as a medicinal herb to help alleviate chest pain and stomach pain. Its strong and sharp flavour also makes it a mild decongestant for common cold. More importantly, the default rule is to take as much green vegetables as possible and this herb is a nice part of the meal.

Thursday 22 April 2010

Spinach Raita


Raita is a yoghurt based condiment and usually contains vegetables. It is my belief that the intent of having raita is to help cope with the heat and spices in the main meal. There are some vegetables like onion and cucumber that are commonly used for raita. I wanted to do something different but did not have lot of vegetables left in my fridge. I had however left a tiny portion of spinach which I couldn’t have used for anything else. Spinach, as everyone knows is one of five a day vegetable. The green leaves are rich in iron,folates and calcium as well. This raita may make it easier to enable children to have spinach as it is otherwise not quite popular among kids. Here is the key to this simple raita...
1 cup spinach washed
3-4 cloves garlic
1-2 green chillies chopped
Yoghurt
Salt if required
Less than a teaspoon cooking oil
In a saucepan, add oil and garlic and chillies. Fry for a couple of minutes and add spinach. Once the spinach wilts, take off the stove and allow to cool. Grind to make a paste and add desired amount of yoghurt. Season with salt if desired. I try to reduce salt intake as much as possible and prefer to bank on the flavour from yoghurt.
You could serve this raita with a main dish that may not have green vegetables just so that the meal is balanced. If you do not like garlic, you may want to use ginger instead.

Sunday 18 April 2010

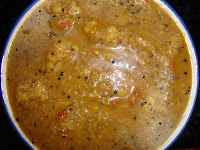
Mung Dal Sambar/Mung Dal Stew


Mung Dal Sambar/ Mung dal stew
Sambar is probably one of the most popular dishes in Southern India, especially Tamil Nadu. I am generally not a big fan of it but my husband loves it. I always make varieties of sambar quite often and ofcourse I do have some favorites. I try to keep the taste unique depending on what the main dish is and that is why I started making mung dal sambar.
Mung is one of the several lentils that we commonly grow and consume in India. Mung bean which is usually green in colour and ovoid in shape is broken and dehusked to yield mung dal. It is quite a versatile dal as it can be used to make a snack by itself and ofcourse a variety of other dishes. Like most dals, it is a good source of protein. Also, this dal is said to cause less wind in the digestive system than other dals.
For this recipe, my main intent was to avoid tamarind as it tends to give a wierd taste that does not go with my main dish which is usually idlis. Here is how I make this nice sambar
¾ cup mung dal
3 tomatoes finely chopped
6 -8 shallot onions or pearl onions
3 green chillies
3 cloves of garlic (optional)
1 tablespoon sambar powder or ½ tablespoon chilly powder
¼ teaspoon turmeric powder
Few pinches asafoetida
Handful of coriander leaves chopped
1 teaspoon mustard seed
1 sprig Curry leaves (optional)
Salt as required
Cooking oil
Cook the dal preferably in a pressure cooker, in which case you will need water an inch above the level of dal. In a sauce pan or wok or kadai heat about 1 tablespoon oil and add the mustard seeds. Once they splutter add curry leaves, turmeric powder and asafoetida. Now add onions (cut them coarsely but if they are small, then just halve them), green chillies and garlic. Once the onions turn soft, add the tomatoes and cook until they become pulpy and come together. Adding few pinches of salt will help speed up the cooking and add water only after it is pulpy. Add the dal and required amount of water based on desired consistency. While it begins to boil add sambar powder or chilly powder and salt. Few minutes later add the coriander leaves and boil for no longer than couple of minutes.

Saturday 17 April 2010

Traditional Tomato Rice


The variety rice I think is a boon to busy parents. I say parents because once you have children, the work load increases so much that we actually get too busy. Sometimes I wonder what I was complaining about before I had my baby as I am doing far more work now. Oh, I say parents because this is such a simple recipe that men of the house can also cook. My husband actually does a good job of this dish. I try to make such rice dish almost everyday of the week as it is quite easy one dish meal pretty much. In my bid to increase vegetable intake and to complement the rice I also try to do raita. I usually make tomato rice in two different ways and this I would say is the shortcut. I do keep raving about tomatoes and their health benefits but I can’t stop thinking how versatile it is. Like in tomato rice, it could be part of the main meal or like in rasam, it could be the flavour of the dish and in gravy it could be the base of the sauce etc. For a while it was a struggle to get hold of the tasty ones when I relocated. In India it was a bit more straight forward as it was usually the ‘banglore thakkali’ or ‘naatu thakkali’ while here there are so many different versions like one for salad another for sandwich. But I have done my trials and now buy loose tomatoes on the vine. They look so beautiful!! Again this recipe is pretty much similar to what my mom would give me in my lunchbox for college. I remember the canteen in the college was awful and she would make variety of rice for my lunch and I would happily share them with my classmates. I even heard one of my childhood friends mentioning a few days back that she still drools thinking of my mom’s tomato rice. Well, I have made my best attempt and here is how it is...
6 big tomatoes, cubed
1 medium sized onion, finely chopped
Mustard seeds
Turmeric
Ginger, 1 inch long piece
Garlic 4-5 cloves
3 green chillies
Chilly powder
Cooking oil
Asafoetida
1 cup cooked rice (ideally the grains should be separate)
Put about one tablespoon cooking oil in a kadai and temper with mustard seeds. Add the turmeric, asafoetida, green chillies, onion, garlic and ginger. Some may not prefer garlic and it could be left out but I would strongly recommend including ginger. Once the onions turn transparent, add the tomatoes and cook until they come together. Adding a little bit of salt could help speed up the cooking process in this case as it enables the removal of water from tomatoes. Add chilly powder and allow to cook for couple of minutes. Add the rice and mix well and season as required. Garnish with coriander leaves.
I usually serve this with cucumber raita or radish raita.

Friday 16 April 2010

Chicken Khurma/Quorn Khurma


Quorn Khurma
Like any typical Brahmin girl, I have never tasted non-vegetarian food before and do not intend to either. My husband and brother however feel it is too much hassle to get good vegetarian food when they travel and hence are more adaptive, if I can say. I believe in not harming animals and hence would like to bring my son up that way. I was told that when babies/children eat with their peers they feel bad if their food looks different from others. So for this reason Quorn gets used to give vegetarian and non-vegetarian food the same look. I should say I was not disappointed at all when I saw it myself. I had no idea what Quorn was but was certain that I will try it once. Google came handy and here is a summary of what I gathered about Quorn.
Quorn is actually a trademark name for products made out of mycoprotein. Mycoprotein is protein from fungi and in the case of Quorn, it is from a fungi called Fusarium. The fungus is suppose to belong to the same family as mushrooms. The products are made with this protein and egg whites and flavourings. Products made from this protein have a texture similar to animal muscle due to similar cell structure. It is a low fat source of protein and dietary fibre. It is suppose to satisfy hunger even with fewer calories and that should be good for people who are weight conscious. Interestingly Quorn products come in different form like mince, fillets, chicken pieces etc. I thought I will try the chicken style pieces to start with and ambitiously bought it at Tesco. It is said that some people may be allergic to Quorn products just like to any other protein and also that it contains gluten.
This was one ingredient that I was absolutely unsure of. Most recipes online just said cook it like other meat as they are typically eaten as a meat substitute by non-vegetarians. I then wrote to the Quorn company to get an idea so I ensure it is fully cooked. They were prompt in replying with lots of advise on how to cook it. I then came up with my own combo and here it is...
1 packet chicken style Quorn pieces
2 red onions finely chopped (depending on size)
3 cloves of garlic finely chopped
3 green chillies finely chopped
1 cup tomato puree
3 pinches turmeric powder
½ teaspoon cumin powder (jeera powder)
½ teaspoon coriander seed powder (dhaniya powder)
½ teaspoon garam masala
1 cinnamon stick
3 cloves
1 bay leaf
½ litre vegetable stock
5oz cream or 1 cup yogurt
Handful of coriander leaves
Salt to taste
2-3 teaspoons cooking oil
Fry cinnamon, cloves, bay leaf, turmeric powder, onions, garlic and chillies in about a teaspoon of oil and once onions are soft, add the Quorn pieces and a teaspoon of oil. Cook for about 10 minutes in medium flame stirring occasionally. The Quorn pieces will begin to soften. Now add the stock (you could use water instead), tomato puree, cumin and coriander powders and garam masala. Allow the mixture to simmer for a good 30 minutes or so and reduce. Add the coriander leaves and cook for a couple of minutes. In low heat, stir in the cream (I used soured cream). If using yogurt, stir in 1 tablespoon at a time. Remove from heat and season. If using stock, remember that it contains salt and adjust salt accordingly.
We had this with chapatti and my husband said it tastes a lot like chicken !! Planning to try the mince and fillets at some point but until then, enjoy some vegetarian meat !!

Sunday 11 April 2010

Groundnut/Peanut Chutney


I amaze myself at times when I want to try some recipes that I actually disliked in the past. One such item is groundnut/peanut chutney. I used to have it (read it as have it on my plate) in my office canteen in India. Usually they would serve it with pongal or a really thick dosa. The quality of food used to be so poor that I used to return my plate full most of the days. The chutney they used to make was watery and way to ‘groundnutty’ for me. I decided to come up with a recipe that would be more for me. Again I had to be quick as I was tired and wanted to get some rest. Needless to say, I relied on my microwave.
Peanuts are packed with nutrients like folate, niacin, manganese etc. They are an excellent source of protein as they are 25% protein. They are also supposed to be naturally free from trans-fat and sodium thus making them a good snack as well. I understand that peanuts were even used to fight famine due to their nutritive contents. It seems roasted peanuts have a high anti-oxidants contents – even greater than apples and carrots. Groundnuts are also called peanuts, monkey nuts (usually with the shell), earth nuts and pig nuts.
Handful of peanuts
2 inches piece ginger chopped
¼-1/2 teaspoon tamarind paste
2 tablespoons coconut powder or dessicated coconut or fresh grated coconut
2-3 dry red chillies
Salt to taste
½ teaspoon mustard seeds
1 sprig curry leaves (optional)
Microwave safe dish
If you have ready roasted peanuts, well and good but you could even roast them quickly in a microwave. Put them a microwave safe dish and cook on high for a minute. Stir them so the heat gets evenly distributed. Heat on high for another minute. Depending on the wattage of your microwave by now the skin may start to peel in the nuts. Heat for no more than a minute after you notice this. Keep aside and remember they become crisp only after they cool. Grate or chop the ginger and add the tamarind pulp and cook for a minute. Put this mixture, roasted groundnuts, dry red chillies and salt in a mixie or food processor and grind. Add required amount of water to get desired consistency and ease the grinding. In a pan or kadai heat 1 teaspoon cooking oil and after is heats add mustard seeds. Once it splutters, add washed curry leaves and serve.
Based on your preference you could even grind the curry leaves along with other ingredients. You could also use Urd dal for tempering.

Saturday 10 April 2010

Low Calorie Vada Curry/Steamed Lentil Dumpling curry


Low calorie Vada Curry
One’s student life is probably the most unforgettable days of our lives and for me my college days are particularly good memories. I enjoyed and loved being in my college and am so thankful for that. As I took a field quite atypical for girls, I was the only girl in my class. While I use to have a group of friends with whom I would have lunch in my class, some of them who were staying away from family would bring lunch from a hotel or mess. That’s how I even got to know of this dish vada curry. I was told by my classmates that it is usually made with leftover vada (now wondering if they were trying to wind me up)and at that time I would not even look at leftover food and that made me have an aversion for this dish. To add to that, the canteen in the office I worked also served this and needless to say that only made my dislike stronger. One of our friends served this for us when we visited them this year and that was when I changed my mind and thought of giving it a shot. I generally do not deep fry for health reasons and also that I am a bit lazy to store the leftover oil and there is no space on my counter. So, I tried a low calorie version of this recipe and here it is:

For vada:
½ cup Bengal gram (channa dal)
¼ cup red gram (spilt pigeon peas/tuvar dal/toor dal)
5-6 dry red chillies
Few coriander and curry leaves
1 onion finely chopped
Salt to taste

For gravy:
1 cup finely chopped onion
1 cup finely chopped tomatoes
¼ teaspoon turmeric powder
Salt to taste
1 teaspoon mustard seeds
1 teaspoon tamarind extract (optional)
Cooiking oil
To grind
¼ cup coconut (fresh grated or powder)
3-4 green chillies
1 tablespoon poppy seeds(soaked in water for atleast 30 minutes)
1 cinnamon stick
2-3 cloves
1 inch long ginger
3-4 garlic cloves

To make the vada, soak the dals for atleast 1 hour and coarsely grind along with dry red chillies and required salt. Add chopped coriander and curry leaves and onions to the ground dal and mix. Make small balls and gently press them to get the vada shape. Steam the vadas until cooked.
To make gravy, add mustard seeds to some oil and after it splutters, fry onions, tomatoes and turmeric powder. Grind all ingredients specified to be ground. Once the tomatoes become pulpy add the ground mixture and required amount of water and cook until raw smell goes. Add required amount of salt. Now add the steamed vadas and boil for couple of minutes. Vada curry is ready to be served.
If you are a vegetarian, this dish will be a different way to get your daily portion of dal. If desired you can add the tamarind once you have added the ground mixture to the tomatoes. I had not cut the onions and tomatoes very fine so just whisked with my hand mixie. This dish is best served with hot rice and some vegetables on the side. This would easily serve 4.

Thursday 8 April 2010

Kothamalli thokku/Flavoured Coriander Paste


Ever since we came back from India, my husband has been finding the mildest of chillies also hot. The devoted wife that I am then started cutting down on the heat and almost used just two chillies only to be told it is still hot. Cutting down the heat so much is not entirely for me so I was desperate to eat something hot and spicy. Around the same time my brother and his wife were going to visit us for the first time. I tried to make some biscuits and a sweet for my brother as he has a sweet tooth and also wanted to make something for my sister-in-law. I always get annoyed when the in-laws family focuses on what their boy likes and not really bothered to make anything the daughter-in-law may like. I thought it is unfair to discriminate. These were the triggers to make this wonderful recipe. I have already talked enough about the health benefits of coriander like it help fighting salmonella infection, urinary tract infection and lowering bad cholesterol. The freshness of the aromatic coriander just made me even more motivated to try this new recipe. I was a bit impatient and tired so could not be bothered cooking on the stove and used the microwave. You could happily do this on your stovetop too. I was very pleased that my sister-in-law really liked this recipe.
2 bunches coriander
½ teaspoon tamarind paste (adjust based on your taste and kind of tamarind)
½ teaspoon fenugreek seeds powder
¼ teaspoon turmeric powder
1 teaspoon mustard seeds
Asafoetida
Cooking oil (you will have to be a bit generous), preferably groundnut oil or gingelly oil
10 dry red chillies
Salt to taste
Microwave safe dish
Separate the coriander leaves from the stalk as I prefer to use only the leaves for this dish. Soak chillies in hot water for about half hour. If you are using tamarind block, then you can soak it with the chillies. Grind the red chillies, tamarind and coriander together to make a reasonably smooth paste. In a microwave safe dish add 1 teaspoon oil and heat for a minute. Now add the mustard seeds and heat until it splutters. Add fenugreek seeds powder turmeric powder and asafoetida and heat for 30-60s. Add more oil (about 4-5 table spoons) and heat for less than a minute. Add the ground mixture to it and cook for 10 minutes stirring every 3 minutes. Season with salt towards the end. The longer this cooks, the better. With oil, it is always more the merrier. If you desire, you can even add about half teaspoon of jaggery or brown sugar and cook for a while.
This dish tastes great when mixed with rice or eaten with curd rice. It can also be used like a base spread on wraps and chapattis or even in a sandwich.This tastes as good or even better than the equivalent you get in Grandsweets !

Thursday 1 April 2010

Gobi Mutter (Cauliflower and Peas) in a creamy sauce


Cauliflower is a vegetable from the cruciferous family just like broccoli, cabbage and brussel sprouts. Vegetables in this family are well known for their cancer preventing abilities. I am made to understand that atleast one serving of cruciferous vegetables every week help prevent prostate cancer in men. The phytochemicals in these vegetables are also said to help detoxify the body especially the liver and also help the body fight against carcinogens. They are also believed to reverse some damage done to cardiovascular system in diabetics. It is these phytochemicals that make them release sulphurous odour while being heated and this only gets worse with cooking time. As repulsive as the odour may be, I have always been a fan of cauliflower. Broccoli on the other hand, I find quite bland and does not even manage to take the flavours from the rest of the ingredients. I usually stick to cauliflower to tap the benefits of the cruciferous vegetables. If all these reasons are not good enough, I am sure the taste and flavours in this recipe will lure you to eat this wonderful vegetable.
I do remember that we used to get it in India only during ’winter’ but as I realised during my recent visit we get it throughout the year these days. As it is my dad’s favourite veggie, I made this dish for him but spared the creamy bit of it. While picking cauliflower, get a clean creamy white flower. If the leaves cover the flower well, even better. Cut the cauliflower florets into required size and put them in hot water for few minutes so you get rid of any insects or worms in it. Never depend on strict stir frying to fully cook the cauliflower as it will take eternity. Before I get into the actual recipe I should mention I used to do this with cream but in view of reducing fat I wanted to find an alternate and bingo – soya milk. Soya milk was a successful replacement for cream and added to the nutritive value of the food. I will elaborate on goodness of soya in a later post, now for the recipe.
1 cup cauliflower florets
1 cup green peas
1 cup chopped onions
1 cup tomato puree
2-3 green chillies
1 teaspoon cumin seeds (optional)
1 inch ginger piece minced
2 cloves garlic (optional)
1 tablespoon kasoori methi (dried fenugreek leaves)
1 teaspoon chilli powder (adjust quantity according to your taste)
2-3 pinch turmeric powder
1 cup soya milk
Cooking oil
Salt as required
Bring water to boil in a pan and add the cauliflowers and peas. Cook for 10-15 minutes. Remember not to overcook cauliflower as they become soggy and mushy.
In a deep dish add 1 teaspoon oil and cumin seeds. Once they turn brown, add turmeric powder and fry the onions, garlic, ginger, chillies
Add tomato puree and cook until it turns pulpy.
Take a hand mixie (grinder) and coarsely grind this mixture. (If prefer not to grind, you may omit this step)
Allow to boil and the mixture come to the centre leaving the oil in the outer. Add chilli powder
Add the cooked cauliflower and peas and season with salt. I usually do until this stage in the morning and leave it until night so the vegetables absorb all the flavours. I finish off the dish with steps below just before dinner)
Add kasoori methi and simmer for 3-4 minutes. The longer it simmers for, the tastier it is.
Add the soya milk and simmer for few minutes. Adjust the quantity of soya milk according to the desired consistency of the gravy. If you want to indulge, use cream instead of soya milk. You may even want to use some milk instead.
Garnish with coriander if desired but not necessary as kasoorimethi is added. Serves best with rice, chapattis, naans,kulchas