Monday 30 August 2010

Wheat and Oats Instant Idli

Wheat and Oats Instant Idli


Idlis are usually associated with the really soft white steamed delicacy and I think that is for a good reason. They are supposed to be quite harmless because they are steamed and make a low fat filling breakfast especially in South India. When I heard, saw and tasted Rava idli, I was quite surprised there could even be a nice idli other than the conventional idli. Years after that, I now have my own kitchen and am trying to make many different kinds of idlis. This is probably the first post of one such success story. This dish has many positives like it can be made instantly without much preparation and also it can include vegetables so you do not have to miss out on them. As always, I have tried to combine grains and in this recipe it is wheat and oats so it is more nutritive and fibre rich as well. I would pre-empt that almost all non-conventional idlis are not as soft as its traditional counterpart. My guess the reason is because traditional idli batter is ground fine and fermented. Having said that, some people add cooking soda to both traditional and other idlis to make them softer. You could try that but I avoid cooking soda as they tend to give a bloated feeling and also reduce the nutritive value of the food.

1 cup grated carrot
1/3 cup rava, roast in a drop of ghee/oil
1/3 cup wheat rava
1/3 cup oats, roast and pound
1 teaspoon mustard seeds
1 teaspoon channa dal
1 tablespoon chopped cashew nuts, 1 sprig curry leaves, teaspoon chopped coriander, teaspoon grated ginger, some turmeric powder (optional)
2/3 cup curd/yogurt
Little more than 1/3 cup water
Salt to taste
Less than a teaspoon oil
Asafoetida

Roast rava in a little ghee or oil until a nice aroma comes. Keep aside.


Roast oats until it becomes aromatic and allow to cool. Pound it to a coarse powder using mortar and pestle or food processor


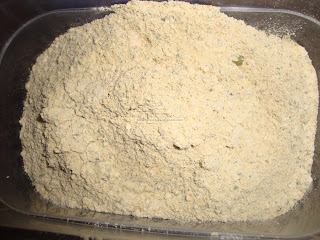
Mix rava, powdered oats and wheat rava. Add salt, asafoetida.

In a skillet, add less than a teaspoon oil and add mustard seeds and once they crackle add to the mix. Also roast channa dal and add to mix.


Add the carrots to the mix and mix the yogurt and add required amount of water to achieve a thick batter consistency (the batter should drop freely from a spoon). While doing so, add any of the optional ingredients you may wish to use.


Pour into idli moulds and steam for 10-15 minutes.


Serve with tangy chutney.

Sunday 29 August 2010

Eggless Banana Muffins


Eggless Banana Muffins


There are a number of recipes that have been photographed and waiting to be written up. As this is a small milestone post, being the 75th post, I thought this would be a nice sweet snack that kids and adults can enjoy. I noticed that my son is at an age where he needs periodic supply of energy rather than big meals. I was looking to make a snack for him and also my husband who would return hungry from work. My son was not eating bananas often these days so I was cheeky and wanted to sneak this into his snack. To keep the ingredients few I chose an eggless version. The result was great. It turned out to be a not so fatty and not too sweet and I really enjoying baking and eating! I must say that I am not an expert in baking and it has taken me sometime to experiment baking. While I have done few Indian dishes like thattai and murkku in the oven, this is the first successful western baked recipe I have experimented. In order to keep it wee bit healthier I mixed little whole wheat flour. I may increase the proportion next time. I was quite surprised how easy it was to make this recipe in few minutes.

2/3 cup All purpose flour

¼ cup Whole wheat flour

Pinch of salt

50g Butter, melted

¼ cup Caster sugar

1 banana, hand mashed

1 teaspoon baking powder

Little more than ¼ cup milk

Mix the flours, salt, sugar and baking powder


Add the butter and mix. Now add mashed banana and milk and combine the ingredients using a spatula. Do not over mix as this may cause the muffin to go hard. The batter should be mixed to dropping consistency.


Fill cups (cup cake cups) to ¾ full and bake in a preheated oven for 20-30 minutes at 180degC. Muffins are done when the top has browned. You  can also pierce a skewer and if it comes out without anything sticking to it, it is done.You may want to grease the cups before pouring the batter.


Cool and serve.


This would yield about 10-12 muffins.

Thursday 26 August 2010

Low Fat Potato Bonda (Potato Fritters)


Potato Bonda (Potato Fritters)


My answer to one question has not been answered at all – does anyone know anybody who does not like potatoes? What a versatile vegetable. It is a shame it is not a 1 of 5 a day vegetables. Having said that, it is an important vegetable in our diet due to the starchy carbohydrates it contains. I have written more about health benefits of potatoes in my post on potato roast . This particular dish is one of my favourites made by my mom. It would normally feature on a Sunday evening and I still remember getting a plateful and getting comfortable in front of the TV to watch the evening movie. It is also my husband’s favourite. I do not make it very often due to the deep frying. That changed once my mom tried vada on the ‘kuzhipaniyara koodu’ and it came out well. Now most of the deep fried dishes get made in this dish to reduce fat. In this recipe I have also added peas and carrots for nutrition and would make a great snack for fussy kids too!

For filling

2 medium potatoes boiled well

¼- 1/2 cup green peas boiled

1 carrot grated

1 sprig curry leaves (optional)

½ teaspoon mustard seeds

Turmeric powder

Salt to taste

Asafoetida

1 green chilly chopped and/or ½ teaspoon chilly powder

For Coating

2-3 tablespoons besan (chickpea flour/kadalai maavu)

Salt to taste

Turmeric powder

¼ teaspoon Chilly powder (optional)

Cooking oil to temper and fry

In a skillet add less than a teaspoon oil, once heated, add mustard seeds and after they crackle add turmeric powder, asafoetida, chillies and curry leaves.

Add the carrot and fry for a couple of minutes. Follow with potatoes and peas. Add salt and chilly powder and mash the vegetables. You do not have to cook this long as they are boiled anyway.

In a bowl, add all ingredients for the coating and make a paste first. Then add little bit more water to make it a little runny (more towards dropping consistency)


Make small balls of the vegetable mixture and dip in the coating mixture and coat uniformly.


Put this in a preheated ‘kuzhi paniyaram’ dish with little oil in each hole. Keep turning each ball to fry all sides.


Take off the flame once golden brown. Serve hot with any chutney or sauce or just on its own.


You could deep fry if you do not mind the fat or calories. The taste was great and I did not miss deep frying and enjoyed this wonderful dish without the guilt!

Sunday 22 August 2010

Pavakkai Puli Kuzhambu (Bitter Gourd in Tamarind Sauce)


Pavakkai Puli Kuzhambu (Bitter Gourd in Tamarind Sauce)


I had made this recipe and clicked the pics a while ago but never managed to write it up. Was reading another post by a friend where she had mentioned how bitter gourd was one of the unpopular vegetables in many households. I then got reminded of this recipe. While I do not always get bitter gourd where I live, I can only relish the pictures for now. As the name suggests it is a bitter vegetable and full of goodness. Some may wonder why god didnotgive a better look and taste to such a bundle of goodness. I love it though. I find it a pleasant change to have something bitter and especially with this recipe, I get lot more flavours added. Bittergourd contains vitamin A, B1, B2 and C. It contains more potassium than banana and is said to purify blood tissue. It grows in hot and humid places and hence not well known in the western world.

Here is my way of making this dish. Sorry about the main picture, I could not resist eating it and got to click only the left over

2 bitter gourds, deseed and cut into small semicircular pieces

2 green chillies

1 teaspoon tamarind paste (adjust according to your taste and strength of your paste)

1 teaspoon mustard seeds

1 teaspoon channa dal

2 teaspoons sambar powder

½ teaspoon red chilly powder (optional)

¼ teaspoon turmeric powder

Asafoetida

Salt to taste

1 teaspoon crushed jaggery (optional)

In a pan, heat less than teaspoon cooking oil. Add mustard seeds and after it crackles, add channa dal followed by turmeric powder and asafoetida. Wait for the dal to start browning.


Add the bittergourd and the tamarind paste. Add enough water to cover the gourd and cook until the gourds are done.


Add the sambar powder, red chilly powder and top up some water if needed.


Allow it to boil for about five minutes and then add jaggery. You could dissolve the jaggery in little water and filter it and add that water as well. Add salt and boil to achieve desired consistency.


Serve hot with rice.


Usually anything naturally bitter is meant to be so. Try not to do too much about the bitterness as the bitterness actually triggers certain digestive juices essential. You could mix some salt and turmeric to the bitter gourd and leave it for 15-30 minutes before cooking. This may make it more palatable for some.

Saturday 21 August 2010

Leek-Potato-Bean Sprout Curry

Leek-Potato-Bean Sprout Curry


Some of you may have read my article compiling information about sprouts. You may have also noticed that I had said I will post some sprouts recipe on my blog and this is the first of many to come. I made this recipe on a day when I was not taking anything sour and hence avoided tomatoes. This recipe is special not just because it has sprouts but also because this is the first time I used leeks in my cooking. Leeks are said to be a cousin of onions. Leeks are said to help reduce bad cholesterol and increase good cholesterol. They are also said to reduce risk of come cancers. As this was my first attempt cooking leeks, though not eating, I used some onions as well. You could easily skip the onions and use leeks alone. I am not a fan of raw food, except ofcourse fruits. So, I prefer to cook sprouts. If you prefer it raw, you could add it after you have cooked the dish.

½ cup chopped leeks

1 medium onion, finely chopped

2-3 large potatoes, cubed and boiled

1 cup bean sprouts (mung bean sprout)

1 cup coconut milk (I added about 1 cup boiling water to a 50g coconut cream packet)

1/4 teaspoon turmeric powder

Salt to taste

Cooking oil

Grind the following to a paste:

Handful of grated coconut

Generous portions of ginger, say 2 inch long piece

4-5 dry red chillies

In a skillet, add some oil and fry onions and leeks and add turmeric powder


Add potatoes. I added sprouts now but from next time I would want to hold it until the dish is nearly done.


Add ground paste and coconut milk. Allow to boil and reduce to desired consistency. If it is too thick, you can add some water. Season with salt.


Serve hot with rice or any bread like chapatti.


To sprout mungbean, I rinse in water about four times. Soak overnight and drain water. Keep covered in a box on my kitchen counter. Starts sprouting within a day.

Tuesday 17 August 2010

Ragi Kuzhi Appam (Finger Millet Sweet Dumpling)


Ragi Kuzhi Appam (Finger Millet Sweet Dumpling)


Here is a nice story I read about rice (akki) and ragi. Lord Indra once found akki and ragi fighting over who is powerful. The Lord told them to go away and work until he summons them back. When they eventually got back, Lord Indra was surprised to see that ragi was still fresh while akki was wilting. And that is why it is considered a shame that rice became more popular than rice. It can also be attributed to the colour of the ragi which it not the most appealing. It is thought that the public distribution system’s pricing did not help ragi sustain its market as rice was sold at a much cheaper rate.

Ragi is superior than rice and wheat nutritionally. It is rich in fibre, calcium, iron and minerals and ofcourse proteins. It is suppose to be an alkaline food and helps neutralise acidity. Ragi is usually the first food offered to babies when they are weaned on solids. I needed no more reason to try and give my child more ragi and this recipe was great for that. As I keep saying, I believe that we should encourage them to eat the same food that we eat and this recipe is one such. You can enjoy this as a snack along with your child.

¼ cup ragi flour (preferably sprouted ragi flour)

¼ cup rice flour

2 tablespoons jaggery

1 medium size banana

Cooking oil

Roast ragi flour until you get a nice aroma

Pinches of cardamom powder

Add some water (not more than a cup, start with little) to the jaggery and boil until it thickens slightly (you will find it sticky between fingers and you do not have to wait for strings to form). Filter this jaggery water.

Mix rice flour, ragi flour, cardamom powder. Mash the banana and mix. Add the jaggery water and make a batter not too thick.


Put the kuzhi paniyara koodu on the stove and heat. Add few drops of water in the holes and put a spoonful of batter. Fry all sides of the appam.


I was pleasantly surprised how little oil this dish needed. I almost had the same amount of oil I started with when I finished the dish.Pierce a skewer to check if the appam is done.


This is a nutritious dish with two grains, rice and ragi and a fruit as well!

Sunday 15 August 2010

Curry Leaf Powder (Karuvepillai Podi)


Curry Leaf Powder (Karuvepillai Podi)


Busy days and lack of energy for an elaborate meal happens more often now. I would always fancy homemade ready meal on such days but is there any limit to what one can fancy? The closest I could get to such a meal was using wonderful powders that I could mix to a steaming plate of rice and pamper myself with some ghee (clarified butter) on it. Wow, I am drooling just thinking about it. When I relocated to UK, I was given a batch of many such powders and one of my favourites is curry leaf powder prepared by my grandmother. I am aware there are other ways of making this powder but I like this best.

Curry leaf shrubs are a common sight in the backyard of many south Indian houses. It has a lovely aroma and colour. It is said that because of its aroma, it initiates salivary action and that is its very first influence on helping digestion. Curry leaves are said to improve the quality of digestive juices. It is considered a good remedy for loss of appetite, tastelessness of mouth associated with fever, nausea vomiting etc. I did not know that curry leaves help control blood sugar in non-insulin dependent diabetics. A paste made with 8-10 mature leaves taken first thing in the morning for 3 months is said to be very helpful and also help weight loss.

With all this goodness, there is one more goodness in this recipe – dal; so you get your protein as well. Here is granny’s recipe...

1 cup toor dal

1 teaspoon black peppercorns

1 dry red chilly

Salt

About 30 sprigs of curry leaf (karuvepillai)

Dry roast toor dal until golden. While the dal begins to change colour add the peppercorns and chilly. Keep aside


Dry roast curry leaves until they appear very dry. I tend to keep my curry leaves in the fridge for a few days and this makes them lose moisture and dry up. I then wash it and roast it until leaves turn crisp. Keep aside


Roast required amount of salt briefly

Once all the ingredients have cooled, grind the dal, peppercorn, salt and chillies to desired consistency (fine or coarse depending on preference). Then add the curry leaves and grind until leaves have ground fine/coarse.

Allow the powder to cool and keep in an airtight container. The powder keeps well for ages.

Friday 13 August 2010

Mildly Spiced Cabbage-Carrot Stir Fry


Mildly Spiced Cabbage-Carrot Stir Fry


Here is one vegetable I wonder who will even like. Cabbage! It is so disliked in my household that most of the times I disguise it. Reason I take that effort is because it is a very nutritive vegetable. Belonging to the cruciferous family, it is said to have ability to help prevent cancer. Did you know that research have found that 1/3rd of the cancers can be prevented by eating the right kind of food? Isn’t that good news? I try to include a wide variety of fruit and veg in our diet. Also I find it more palatable and nutritionally advantageous to combine vegetables and cook them; you may have seen other similar posts on the blog. I learned this recipe from my mother-in-law. She had made it for dinner along with rasam and rice. I quite liked it and have been trying to replicate. Quite a simple recipe.

1 cup finely chopped cabbage (adjust quantity according to your preference)
1 cup grated carrot
1 teaspoon grated ginger
1 teaspoon mustard seeds
1/4 teaspoon turmeric powder
1-2 green chillies slit/chopped
Asafoetida
1 teaspoon cooking oil
Salt to taste

In a heavy bottom dish or skillet, heat the oil and add mustard seeds. Once they crackle, add chillies, ginger, turmeric powder and asafoetida.

Add the vegetables and cook until done


As both carrot and cabbage are salad vegetables so can be eaten raw, you do not have to cook them for long. Season with salt in the start of cooking so they cook faster.


I like it with rasam and rice but some may like it with chapatti also.

Wednesday 11 August 2010

Pulav (Pilaf/Pulao)


Pulav/Pilaf/Pulao

For a long time now, I have been trying to figure out the difference between pulav and fried rice. I have googled quite a lot but not found a convincing answer. Most answers are in the lines that fried rice is a Chinese way of combining pre-cooked rice with other ingredients on a wok. If you know a better answer, I will be glad to hear from you.


I have been meaning to post pulav recipe for a long time now as my sis-in-law wanted this recipe. Somehow I never got to make it although it used to be a regular dish on our weekly menu. I think it is because my husband has shown more interest in sambar and curd rice now that I could not bother making this dish just for myself. Usually when I sense that we have not had enough vegetables in the last couple of days or so and say if I have little quantity of several vegetables left over, I usually make vegetable pulav. I must say that it is not like the lovely pulav that my mom used to make early in the morning so I could take it to college for lunch but it is close. She was so quick, she even used to do it when I used to work in Chennai and would leave home at 6 in the morning. I have a LOT to learn from her!

The key to pulav is to have the right consistency of rice and by that I mean, the grains should be cooked yet well separated so it is not like a mushy mass and ends up like upma than pulav. As pulav is usually not made very spicy like briyani, I think it is important to infuse nice aromas and flavours into the rice. Here is my simple pulav recipe.

1 cup rice, rinsed
1 cup vegetables of your choice (I usually use peas, capsicum, carrot, baby corn etc.)
1 big onion thinly sliced
2 green chillies slit or chopped
1 teaspoon cumin seeds and another teaspoon black cumin seeds (Kashmiri jeera)
¼ teaspoon turmeric powder
1 cinnamon stick
1 star anise
1 bay leaf
2-3 cloves
2 cardamom pods
Ghee or cooking oil
Salt to taste
Ginger, an inch long piece grated

In a skillet, add about 2 teaspoons ghee or cooking oil and once hot, add all the whole spices except the cumin seeds. Once the spices start frying and give a nice aroma, add the rinsed and drained rice and fry so the grains are coated with oil/ghee. Fry until the rice turns white.


Pressure cook the rice with equal amount of water. Usually people use 1:2 ratio of rice and water but I find that the rice turns mushy. You may have a different experience with the rice you are using, so please use your discretion. If you do not pressure cook, you could always cook it in a pan. Whichever way you chose, cook the rice with the whole spices so all the flavours and aroma  infuse.


While the rice is cooking, in the skillet add about a teaspoon of oil and once hot, add the cumin seeds. Allow them to start turning darker. Then add onions, turmeric powder, chillies and ginger and fry until onions start turning transparent.


Add vegetables and cook until done. If you like your peppers crunchy add them towards the end. Add required salt (including what you need for the rice)


Once the rice is cooked, try to cool it on a plate. If you mix when the rice is hot, it may easily break the grains. Once cool enough, mix with vegetables and garnish with coriander.


Serve with a spicy curry or keep it cool with a raita!