Sunday 31 October 2010

Low Fat Dum Aloo


Low Fat Dum Aloo

During one of my routine weekly shoppings I noticed that we get what are called miniature baby potatoes. These are the size of the baby potatoes we used to get in India. Strangely, the ‘baby potatoes’ we used to get normally was the size of an average potato in India. I used to wonder if baby here meant toddler. Anyway, now that I get the real small potatoes, first thing I thought I should do was Dum Aloo. I also had a book by Tarla Dalal that had the recipe for this awesome dish. The moment I saw deep fry in it I was a bit disappointed. I then wanted to adapt that recipe to reduce fat and as always baking came in handy. So, that’s the story about the origin of this recipe in my kitchen. I really loved the outcome and I had made it so hot, I loved it. I have reduced the number of chillies in this recipe to reduce heat, increase or decrease further based on your preference. One mistake I did was I did not prick the potatoes before roasting them. I would do it the next time or else they seem a bit funny when you bite into them. Here is the adapted version...

For the potatoes:
15-20 baby potatoes
2 tablespoon oil
1 teaspoon chilly powder
1 teaspoon dhania powder (coriander powder)
1 teaspoon jeera powder (cumin powder)
1 teaspoon kasoori methi (dried fenugreek leaves)
Salt to taste
Turmeric powder

For gravy:
2 cups chopped tomatoes
3 dry red chillies
4-5 cashew nuts (optional)
1 teaspoon cumin seeds
1 teaspoon chopped ginger

Pierce each potato using a fork and combine all ingredients mentioned for potatoes. Marinade for about 10-15 minutes. (just washing the potatoes is enough, the skin will help keep it crispy)

Bake the potatoes on foiled baking tray at 220degC for about 20-30 minutes and keep moving them every ten minutes. Once done, try to resist temptation to eat them straight away.

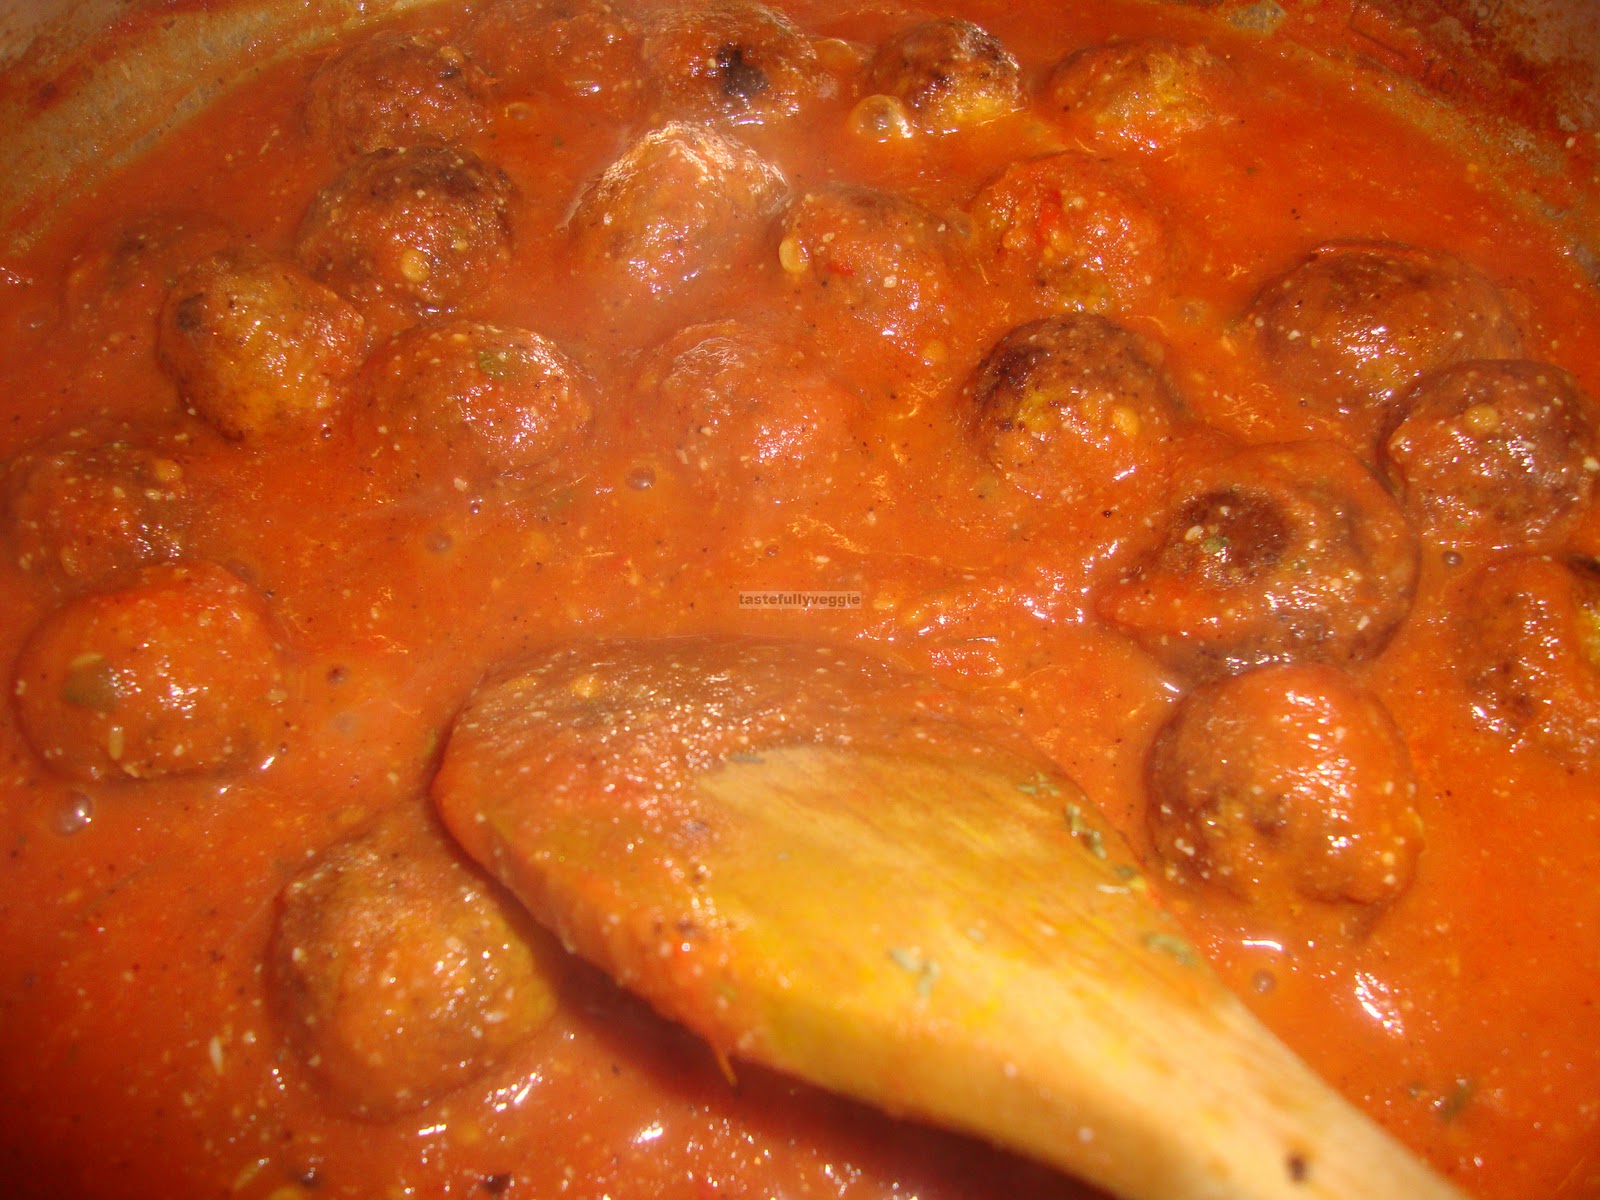
While potatoes are baking, combine all ingredients mentioned for gravy in a saucepan. Cook in 2 cups water until well done. Cool and blend until smooth and bring back to saucepan, add salt.


Add the potatoes simmer for about 10 minutes, add water if needed.


Serve with a nice Indian bread or pulav.


Saturday 30 October 2010

Zucchini Sandwich (Courgette Sandwich)

Zucchini Sandwich (Courgette Sandwich)

As far as making up dishes goes, necessity is the mother of invention for me. Well, not that I actually invent but it is more create by putting together the right things in right amount. One morning I was running out of options for breakfast and found oats porridge a bit too bland and thought of cleaning the dish in which I make the porridge was not encouraging either. I wanted something with nice taste in it and also some vegetables. I then decided to make myself a toasted sandwich. My husband had bought a sandwich maker for me as I like sandwiches toasted in it. This was a good chance to use it. It came out very well and I would have absolutely no problem having this again for any meal. If you make this for your kids, you could reduce the chillies. Zucchini is called courgette in the UK.

1 small onion, finely chopped
2 green chillies, finely chopped
½ courgette finely chopped
Salt to taste
Herb of your choice – I used fresh coriander for one and dried basil for another sandwich
Little oil

Heat about a teaspoon oil and fry the chillies and onions briefly and add courgettes. Add salt and cook until done.


Spread some cheese or butter or any of the spreads and put some cooked courgettes on it. Sprinkle the herb and close with another slice.


Put this in your sandwich maker and toast until you get desired colour.


This quantity makes two sets of sandwiches. You may want to add some grated cheese as well.

Friday 29 October 2010

Savoury Carrot Bun

Savoury Carrot Bun

Snacks are very important for both kids and adults. It helps us have the recommended six meals in a day. Snacking is said to help arrest cravings and eating well portioned meals rather than stuffing oneself in one go. For toddlers and young kids, snacks are all the more important as they constantly need to be refuelled. As I have always said, my philosophy is to make food common for my child and us. I would not want to bring him up on special food and end up cooking ‘n’ number of recipes in a day for years to come. Also, young kids tend to have a sweet tooth. This is not just their usual preference but I read somewhere that we are born with more tastebuds for sweets than savoury. Sugar is empty calorie and hence I prefer to give my child savory snacks ofcourse not high in salt. I have been trying this recipe for a while. As the amount of oil is very little, I was struggling to get a nice shape when I used muffin moulds as they would just stick to the paper. This time I tried to place them on greased baking sheet like cookies (especially American cookies) and they came out well. Interestingly their final consistency was like ‘vada’, soft and easy to chew. All of us enjoyed it and hope you and your child like it as well. Here is how I did it...

¼ cup whole wheat flour
¼ cup all purpose flour (maida)
1 grated carrot
½ teaspoon coriander powder
½ teaspoon cumin powder
½ teaspoon baking powder
Salt to taste (I would usually use less salt for my kid)
2 tablespoons yogurt
¼ cup milk
Little water
1 tablespoon oil
1 tablespoon chopped coriander

Mix all the dry ingredients along with carrots and coriander


Add the milk, yogurt and required water (you will not need more than a spoon or two typically) to make a dough that is just a touch lose (like cookie dough).

Place spoonful of the dough on greased baking tray and slightly flatten the top to give it a nice shape.


Bake in preheated oven at 180deg C for 15-20 minutes. Check if it is done by inserting a fork and ensuring nothing sticks to it while taken out.

 Serve!


If you are making this for adults only, you could add some chopped green chillies, ginger paste. You could also add finely chopped onions even for your kid.

Thursday 28 October 2010

Wheat Khichdi

Wheat Khichdi

A packet of wheat rava (cracked wheat) seems to be far more expensive than much higher quantity of wheat flour. Anyway, that’s not the point. The point is that it is one of the most important grains and possibly one of the most consumed grains. For me it is usually either rice or wheat but I do try and include many more grains but these seem to be my default. As most people know one thing that vegetarians will have to be careful and watch out for is protein consumption. They say it is usually not a problem if you take dairy products and eggs but it is good to take a variety of proteins as vegetable proteins are said to be incomplete. For this reason I decided to combine wheat, which also has some protein, along with dal. This is pretty similar to the traditional khichdi but I guess recipe for that varies. I added as much vegetables to this dish as possible and served it with a tangy side dish (tomato onion masiyal). This complemented the otherwise bland khichdi. Here is how I did it…

1 cup wheat rava
1/3 cup moong dal
2 cups mixed vegetables of your choice
1 green chilly, finely chopped
1 big onion, finely chopped
1 teaspoon mustard seeds
1 inch ginger, grated
Cooking Oil
Salt to taste
Asafoetida
Turmeric powder
1 sprig curry leaves

Pressure cook the moong dal and wheat rava together. I used about 4 cups water and allowed it to become a bit mushy.
In a skillet, heat a teaspoon of oil and add the mustard seeds. Once it splutters, add the curry leaves, asafoetida, turmeric powder, green chilly, onion and ginger. Fry the onions.

Add the vegetables and cook until they are done. Alternately, you can even boil or steam your vegetables.

Add the cooked wheat – dal mixture, salt and some water and bring to gruel consistency.

Serve with nice chutney or the masiyal like me.

You can make this with bulgar wheat as well. I noticed that the more water I add to the wheat, the more quantity it yields. This quantity will be enough for upto four.


Tuesday 26 October 2010

Tandoori Aloo (Indian Potato Wedges)


Tandoori Aloo

Something unusual must have been happening in my kitchen, otherwise I wouldn’t be left with a full packet of potatoes unopened. It is one vegetable that gets consumed quite easily. As we do not get many vegetables that are ideal for Indian meal, many times we need to default to potatoes. Not that it is not enjoyable but I usually prefer to have another veggie in addition to potato. Reason is that as good as it may be, it is not one of the five a day vegetables because it falls into the starchy vegetable category which is still important. Anyway, sometime back I tried what was called Tandoori Aloo and I adapted a recipe from a website, I think it was Natco’s website. It turned out to be a disaster and I had to throw away one of my favourite dishes. I ended up wasting ingredients, potatoes and a nice terracotta dish – shame! I wanted to give it a shot again but I did not quite remember what my earlier recipe was. This time I made up something on the go and it is possible that I have been baking a wee bit these days and that might have helped me in this recipe. It turned out to be great and my husband said he has not tasted anything like it before (in a good way!). I think this is a nice recipe for the western palette as well aas it could replace the potato wedges and be a nice change. Here is how I did it…

3 big potatoes, cut into finger sized pieces (long and not too thin, just like French fries)
1 teaspoon coriander powder
1 teaspoon cumin powder
1 teaspoon chilly powder
1 teaspoon sambar powder (optional)
1 tablespoon besan (chickpea flour)
2 tablespoon yogurt
1 teaspoon kasoori methi (dried fenugreek leaves) or any other dried herb
1 teaspoon sesame seeds, crushed lightly
Turmeric powder
1 tablespoon oil
Salt as required

Mix all ingredients adding oil at the end and mix again.


Marinade it until the oven preheats to 200degC. Prepare a baking tray and grease it so the potatoes do not stick. I used an Aluminium foil and little oil. Bake for 15 minutes, mix so all sides get evenly cooked and bake for further 15 minutes.

Serve!

Monday 25 October 2010

Paruppu Podi

This item was an indispensible part of my menu as a child. Well, it still is until date. I always need to have a box of the podi in my pantry. For those unfamiliar with this, South Indians usually have some powders (usually a mixture of spices and lentils) handy so it can be mixed with hot rice and ghee and eaten. They come in very handy on days when you barely have any time and energy. Paruppu podi is my favourite and needless to say it has to be mom’s recipe. I very clearly remember the ‘dabba’ in which mom used to keep the powder. It was part of her routine to make the podi periodically and store in it. The ritual includes roasting the ingredients and waiting on the maid to go to the mill to get the powder ground. As the ‘mixies’ (Indian food processors) do not do a good job of making fine powders, it is usally sent to the mill. They used to have funny timings and was always a struggle to go ourselves as my mom was working as well. There would be a series of instructions to the maid because mom would always fear that she may keep the ingredients or ground podi in wrong places (poor hygiene) and also that the guy in the mill may put the powder in same machine that grinds sambar powder. This would be a big issue as it would make the powder way too spicy and lose its original flavour. The maid usually would get to keep the change. Anyway, in this post, I have shared my mom’s recipe and another recipe. The second one is a common recipe if you buy the powder from a store. I prefer my mom’s but you could try both.

Recipe 1:
½ cup toor dal (pigeon peas)
1 dry red chilly
1 small piece of asafoetida
Cooking oil
Salt to taste

Heat few drops of oil and fry the asafoetida. Roast the dal until it just starts to change colour (brownish) and roast chilly until it turns crisp. Add salt to the hot skillet and keep all ingredients together to cool.
 Grind to fine or coarse powder depending on your preference.


Recipe 2:
½ cup toor dal (pigeon peas)
½ cup channa dal
4-5 dry red chillies
1 teaspoon black peppercorns
1 piece of asafoetida
2 sprigs curry leaves

Similar to previous recipe, fry asafoetida in oil and roast the toor dal and channa dal separately until they begin to darken. Roast chillies until they are crisp; roast peppercorns until they begin to pop in the skillet and roast the curry leaves until it dries; add salt to hot skillet.

 Cool all ingredients and grind to fine or coarse powder. Add the curry leaves last and just pulse the mixie.

Recipe 2 is quite spicy and is better when ground fine. If you do not have solid asafoetida, use powder. Salt is quickly roasted to remove moisture and improve shelf life of powder. They will last even over a year! I love paruppu podi rice with vathal kuzhambu or avakkai pickle (mango pickle).

Saturday 23 October 2010

Pakoda Kadhi

Low Fat Pakoda Kadhi

I have very often come across pakoda kadhi recipe. Last time I saw it was on Sanjeev Kapoor’s website. I was not keen on it because I do not think I will like pakoda in kadhi. As I had planned to make pakoda and was looking for something other than sambar (vegetable and lentil based stew) to make for my husband I thought kadhi will be a good idea. That’s when I decided to make pakoda kadhi and see if he likes it. I usually look at different websites for ideas and formulate my version because quite commonly I would not like few ingredients in the versions I see or I may not like doing it a certain way, like deep frying etc. What I get stuck with is this idea and not the recipe that I saw online. I barely get time before I start cooking to check the recipe. I then start making it the way I thought I would and evolve the recipe as I cook. This one may not be particularly different from others but this is how I ended up making it...

1-2 cups yogurt
1 ½ tablespoons besan (chickpea flour)
¼ teaspoon powdered roasted fenugreek
Turmeric powder
Asafoetida
1 teaspoon ginger-green chilly paste
1 teaspoon mustard seeds
1 dry red chilly (optional)
2 tablespoons chopped coriander for garnish
Salt to taste
Cooking oil
Low fat pakoda

Whisk the yogurt with some water and add turmeric powder, asafoetida the besan and mix until there are no lumps

Add the fenugreek powder and ginger-chilly paste and bring the mixture to boil on low flame. Add more water based on desired consistency.

Take the mixture off the flame after it boils briefly and heat little oil and add mustard seeds. Once it splutters, add the dry red chilly and heat until it turns crisp. Add this to the mixture.

Add required salt, mix and add the low fat pakoda and garnish
 Serve with rice
Look at the low fat pakoda post for its recipe.

Friday 22 October 2010

Low Fat Onion Pakora (Pakoda)

Low Fat Onion Pakora (Pakoda)
It is suppose to be autumn now but it is already cold like winter. It is typical Scottish weather just now with almost constant rain and dullness. Nothing like Indian snacks can bring some vibrance to the otherwise dull day. Sitting with a hot cup of tea, chatting with a friend biting into a nice crispy snack is probably an ideal afternoon. Well, I have not quite managed that today but certainly made arrangements for a snack. I decided to make low fat onion pakora (pakoda). In addition to the fear of fat content in deep fried dishes, I am lazy to dispose off the used oil properly. This is another important reason why I shy from deep frying. This pakoda recipe turned out quite good and here is how I did it...

1 cup besan (chickpea flour)
¼ cup rice flour
1 onion, finely chopped
1 green chilly finely chopped
2 tablespoons chopped coriander
1 tablespoon oil
½ teaspoon red chilly powder
1 inch ginger, finely chopped or use ginger paste
1 teaspoon sambar powder (optional and if using, adjust chilly powder according to heat in sambar powder)
Asafoetida
Turmeric powder
Salt to taste

Combine the onion, chilly, ginger, coriander leaves, chilly and sambar powder, flours, asafoetida and turmeric powder

 Heat the oil and add to the above mixture

 Add water little by little and make a stiff dough. I added about half cup water.


 Either using a spoon or your hand, place small portions of the dough on a baking tray lined with baking paper. I liked the imperfect shape so used my hand.


Bake in a preheated oven at 200degC for 10 minutes. Turn the pakodas and bake for further 5-10 minutes


 Serve with chutney or by itself!

Remember that for the same amount of chilly powder, baked dishes are hotter than deep fried counterpart. So adjust chilly powder according to taste.

Wednesday 20 October 2010

Spinach Roti

I have possibly said this like a hundred times now but I really believe that it is very healthy to get different grains in your diet throughout the day. For this reason I usually make different rotis normally for dinner. I have been wondering why I eat far lesser quantity if roti is on the menu but tend to eat a lot if it is rice. I think the very fact that you cannot eat rotis without chewing it makes the eating process slower and hence allows enough time for your brain to get the signal that the stomach is full. Whereas rice if well cooked, could just be swallowed quickly. Well, that is my theory and very interested in hearing any explanation from you J. It was dinner time again but I just did not have the enrgy to make a side dish and rotis. I just wanted one dish in which I could get my vegetable and cereal. Parathas are the usual choice but I had some spinach leftover in a bag and it was almost time to do weekend grocery shopping. I decided to make spinach rotis and it turned out pretty good. I have already said a lot about the goodness of spinach in few other posts. In summary, this is a healthy and light meal. It is a great finger food or even a meal for toddlers as well.


2 handful of spinach
1 teaspoon finely chopped green chillies
2 teaspoons ginger paste (you could also add garlic paste if you fancy)
½ to 1 teaspoon cumin seeds
1 1/2 cups wheatflour
1 teaspoon cooking oil
Salt to taste

Grind all ingredients except the flour and salt in a food processer. I would like it to start looking like finely chopped and would not want to make a paste.

Mix this with the flour and salt and make a soft dough. Apply some oil in your hand and knead the dough well. Depending on the spinach you are using, you may not need to add any water, but judge that for yourself. I found that the dough began to get softer as I kneaded it and did not need any additional water.

Divide them into lime size balls and roll them flat using rolling pin. Use some flour for dusting.

Cook both sides of the roti on a hot tava/pan.

I would cook one side until I start seeing ‘bubbles’ and then turn and cook second side again until it starts rising slightly and would apply gentle pressure using a ladle. Then again turn side for it to rise. This roti will not rise as much as conventional roti. Also, because of the green colour you just have to be extra careful while checking for brown spots to check if it is done.


Above quantity will make about 6 rotis. For some reason I have not been able to load all pictures but atleast the main ones are here, will try again later.